
July is here and I’m still finishing up my Mommy Oasis. I’ve been working hard trying to get everything just right. Because I have (nosey) neighbors that are pretty close, I wanted to add curtains to my porch. After some window shopping, I learned that outdoor panels, especially the amount and size I need, are not cheap. I have 8 large windows to cover. At $50 to $100 retail a panel, I would have to kiss the curtains good bye. After talking to my Pinterest savvy friend from Unlikely Martha, she told me about drop cloth curtains. It’s a budget friendly way to get the curtains you want for the low low both inside and outdoor spaces. Everyones home is different, so here’s how I did mine.

I decided to make my own curtain rods and brackets. The hardest part about DIY curtains and rods, is figuring out how you want to hang them. Some people use regular curtain rods which can be pretty cheap individually but I have 8 large windows to cover so that won’t work for me. Before getting started, I suggest studying your window and how you want your curtains to hang. Or, you can do like I did and drag two kids to the hardware store several times trying different items. 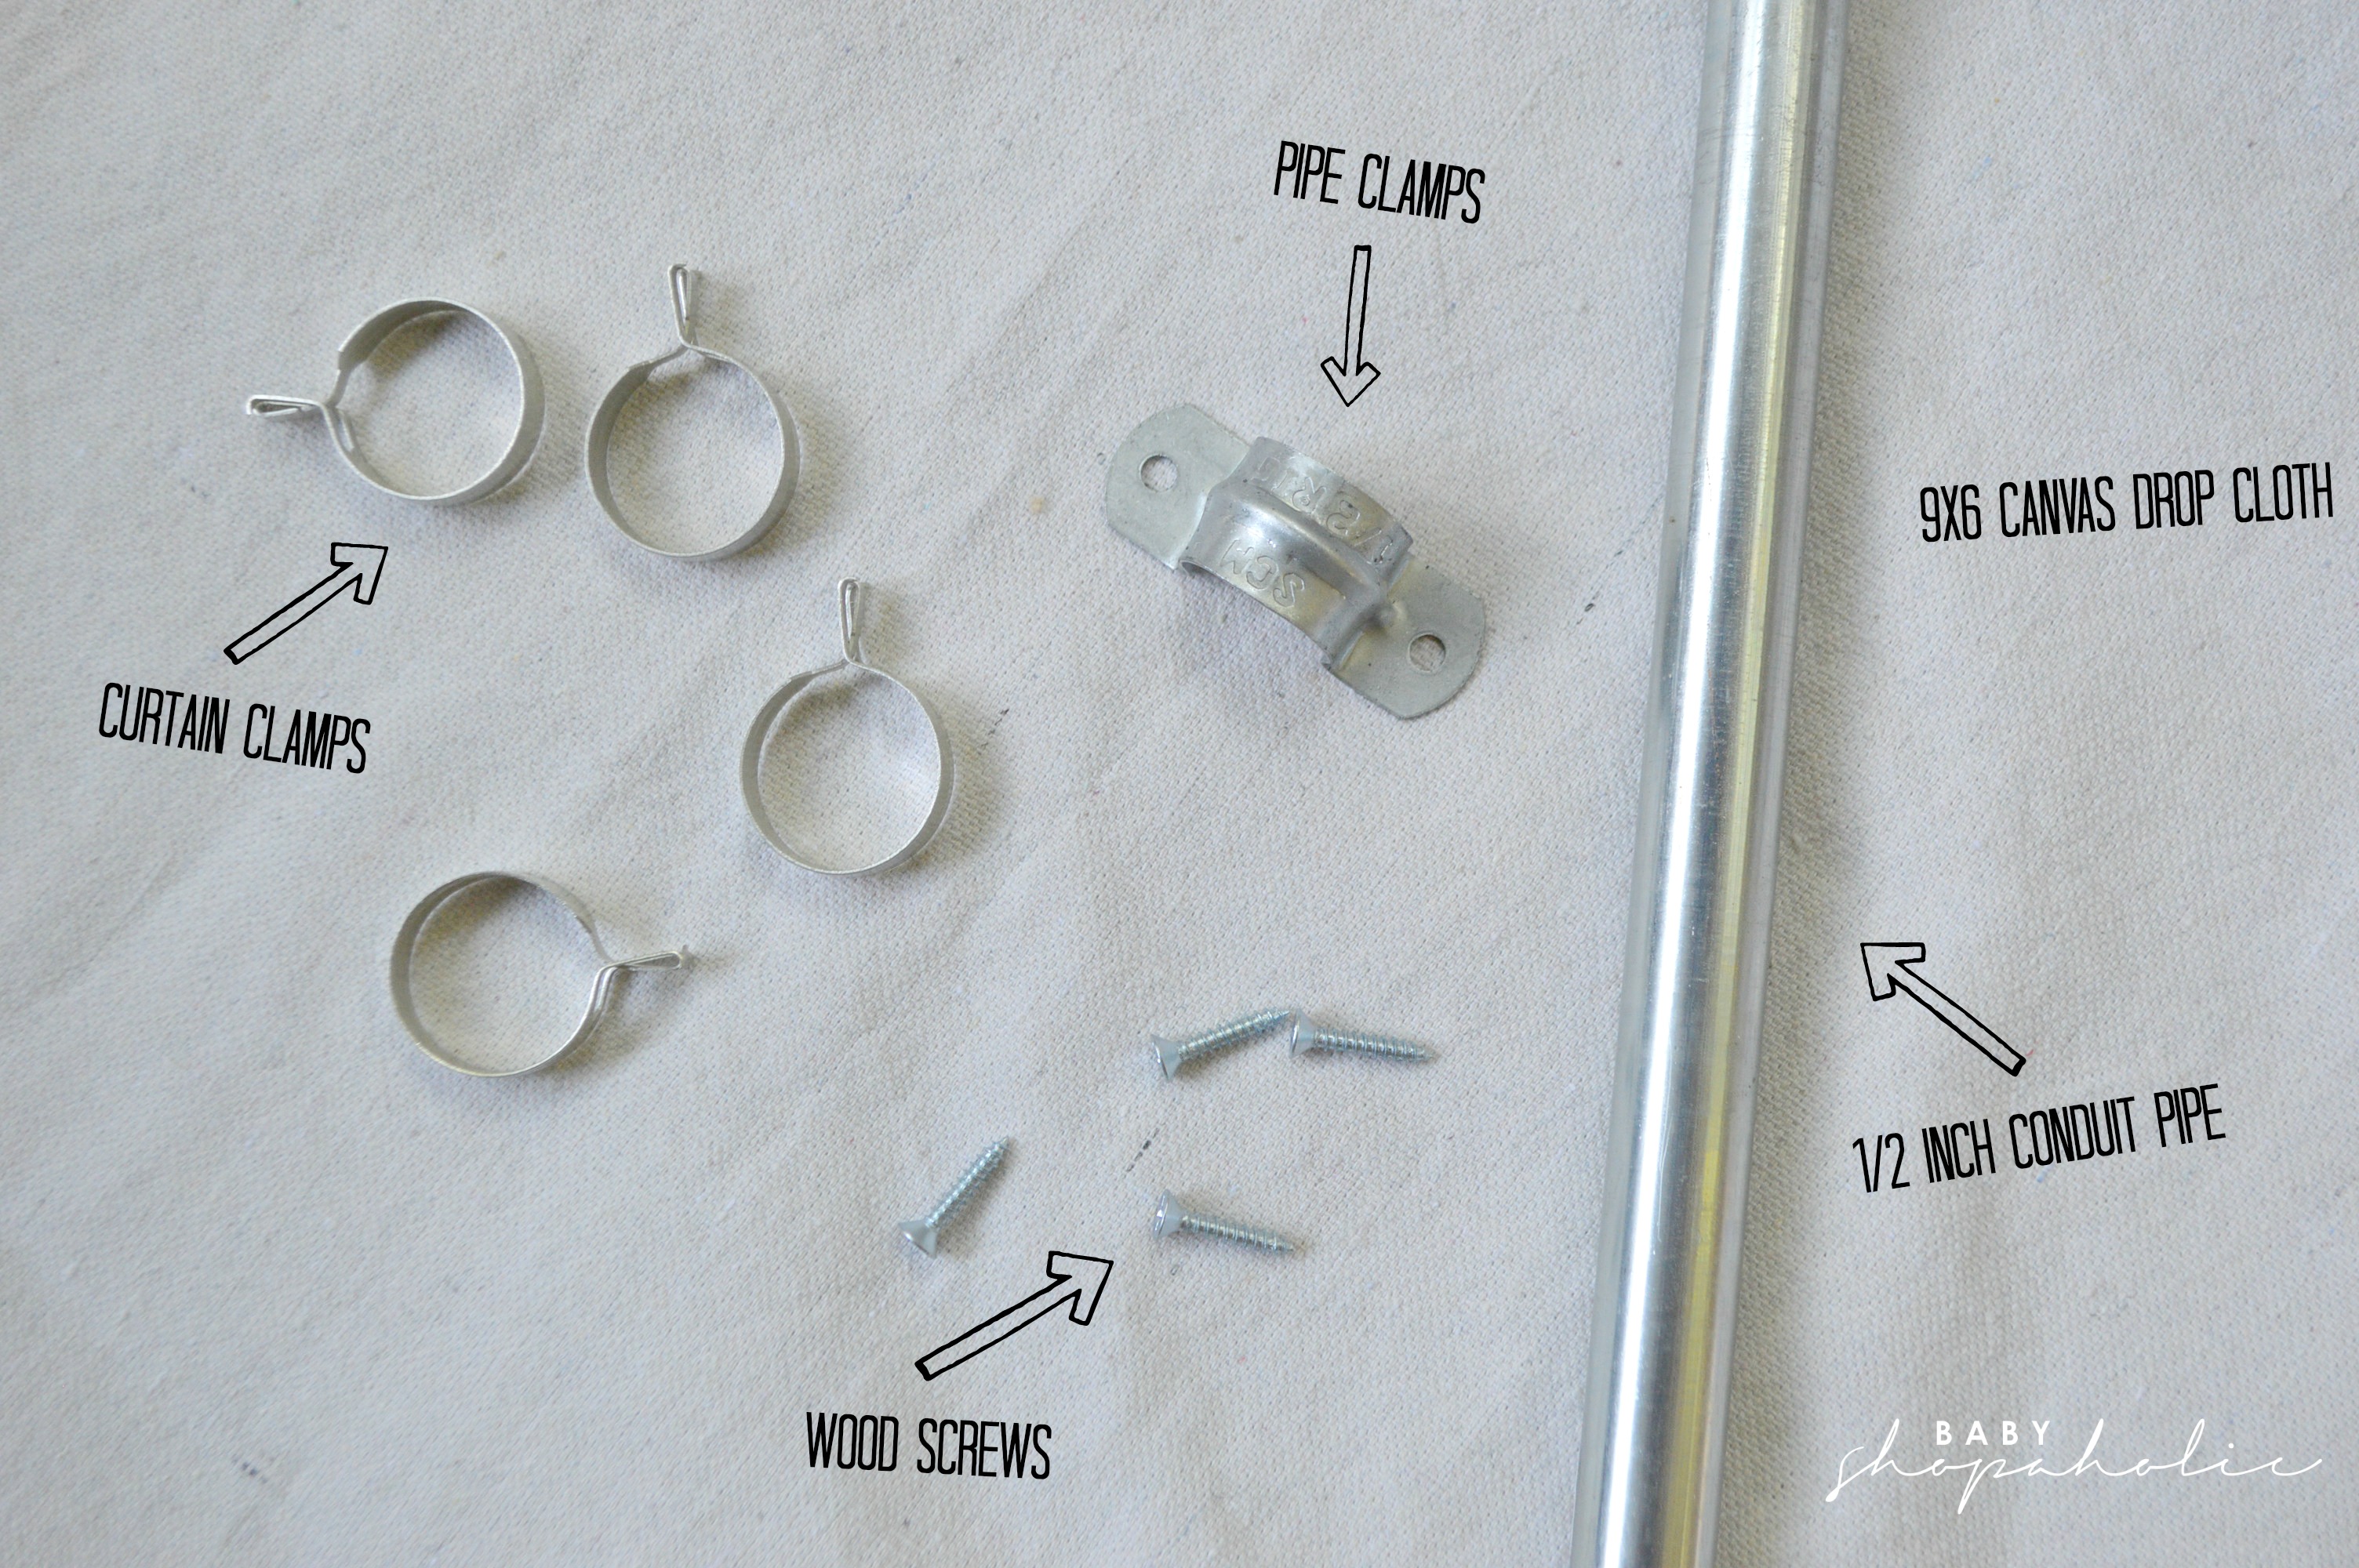
What you need: Canvas Drop cloth, Home Depot $11 |1/2 in Conduit pipe (found in electrical but get them cut in plumbing section), Home Depot $3 for 10ft | Wood screws $5 pack of 100 | Curtain clamps, Walmart (Mainstay in stores only) $3 for 14 (or HERE for good price) |1/2 in Pipe clamps (found in plumbing), Home Depot $4 for 10
Before I started on anything, I washed and ironed all my drop clothes. Washing them makes them a lot softer and helps them to “drape” better. They were “mad” wrinkled when they came out of the dryer (probably because I let them sit in there too long). I tried to run the dryer again in hopes the wrinkles would fall out but it still didn’t look good to me. So I broke out the ironing board.
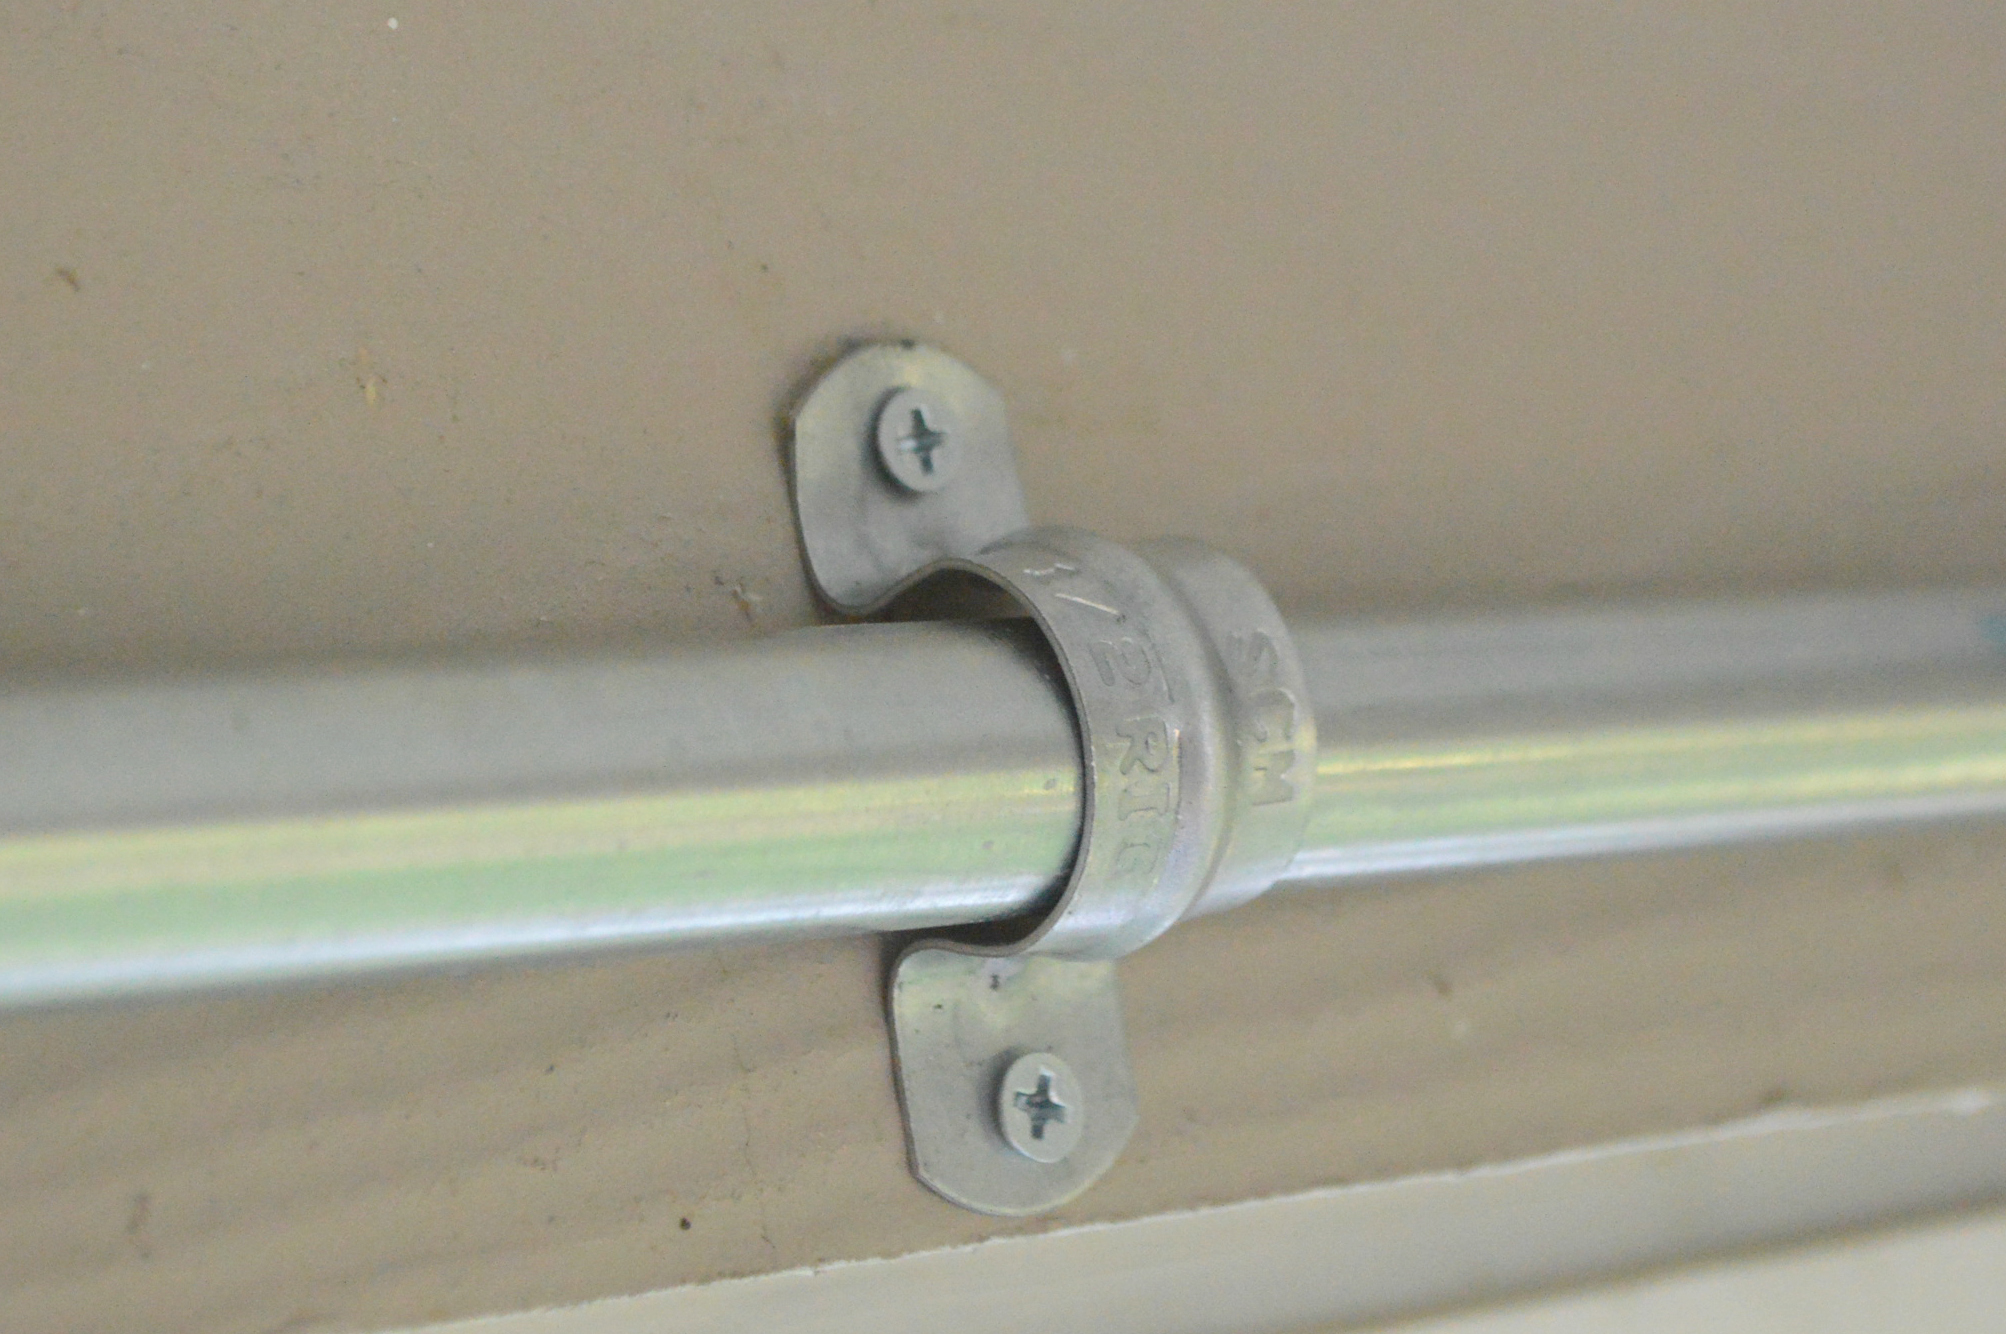
I took a pen and put dots in place for the pipe clamp holes. At first I thought it would be a problem with the rod laying flush with the wall but it wasn’t. You don’t understand how happy I was that it worked out. You can always use cafe rod brackets to hang your rod (conduit pipe) but they cost between $5 TO $8 per bracket and remember you need two for each window. I have 8 windows, so that was a No Bueno. If you use pipe clamps for a bracket like I did, make sure you leave enough space in case you need to take the rod down to remove or wash your curtains. The first two windows I did, I had to take one of the brackets off in order to hand the second rod. Annoying.
Enough with my rambling, here’s a summary of what you need to do:
- Measure your windows for the rods.
- Purchase supplies from the hardware store. You can have the pipes cut to size in the store.
- Wash, dry and iron the drop cloths.
- Mark where you plan to hang your curtains.
- Use a drill to get the holes started.
- Use a hand screw driver to screw in the wood screw (I know it seems like more work, but it works better by hand).
- Fold over the top of the drop cloth to get the desired length (remember they are 9 ft tall).
- Place curtain clamps evenly across the curtain (I put two clamps right next to each other on the ends for more security).
- Load the curtain onto the rod (conduit pipe).
- Stick one end of the rod in the bracket (pipe clamp) and slide it down until you have enough room to slide the other side in. Remember if you have walls or another rod, you may want to space your pipe clamp closer to the ends of your window.
- Sit back and enjoy!
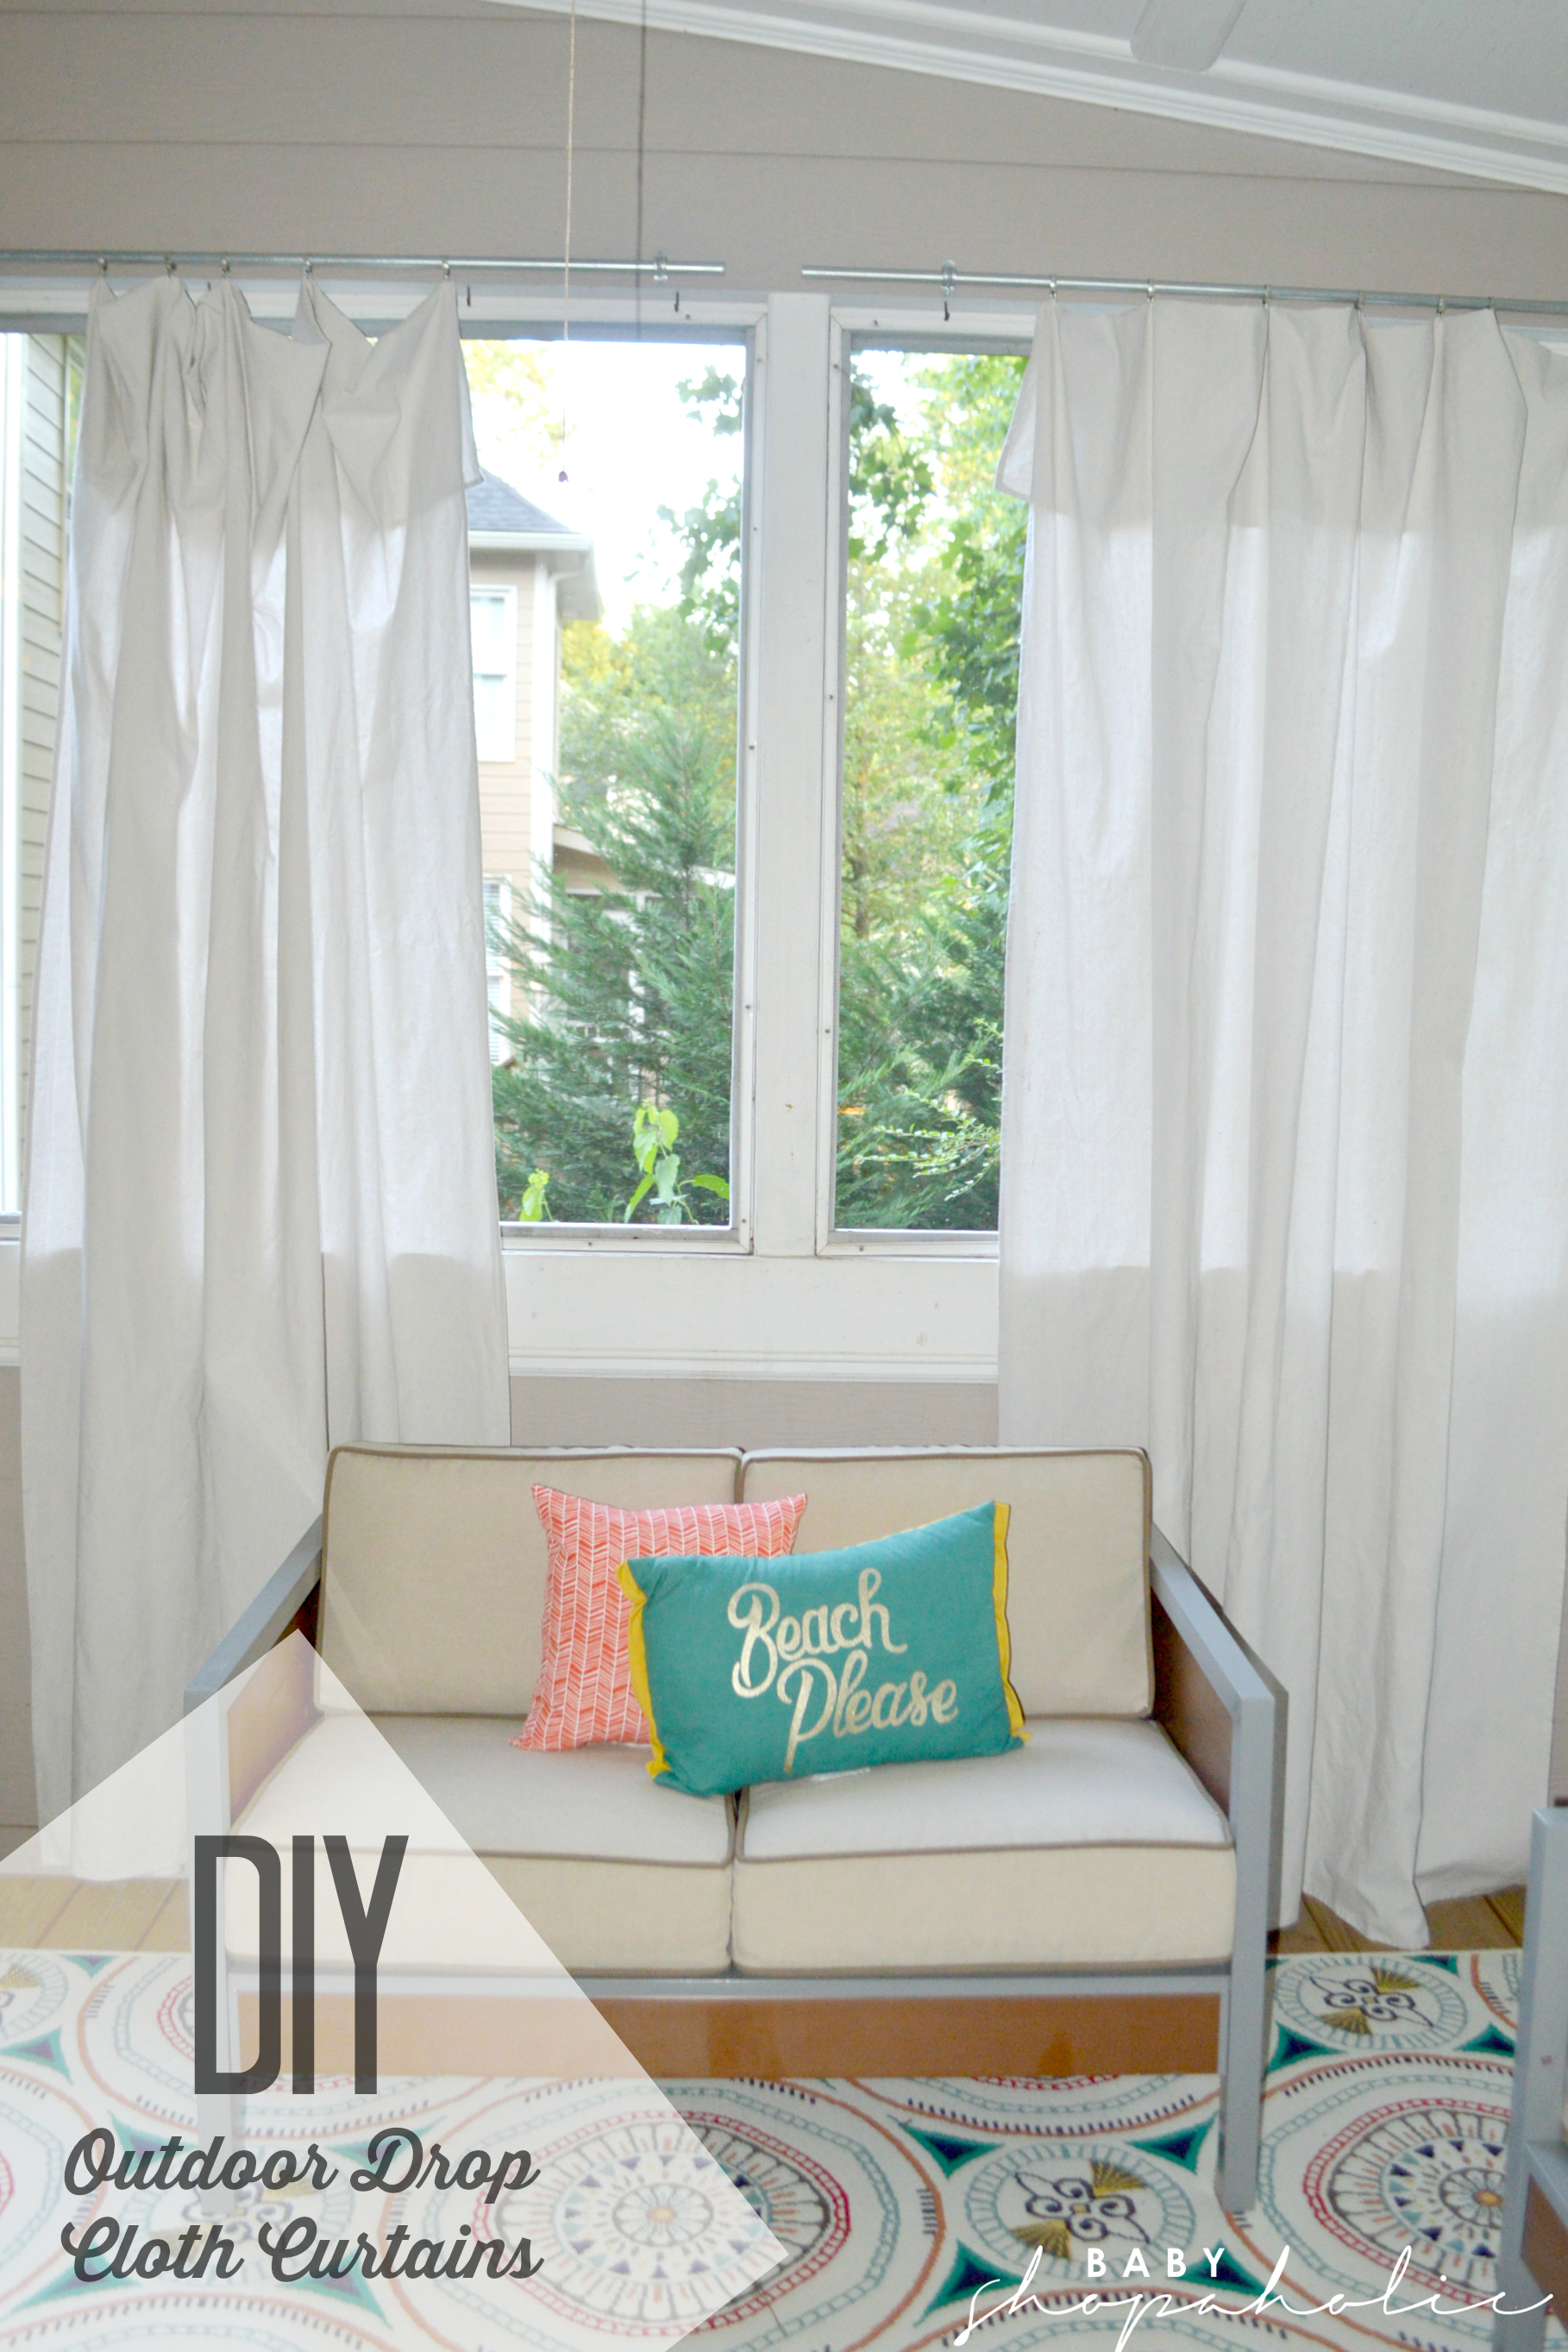
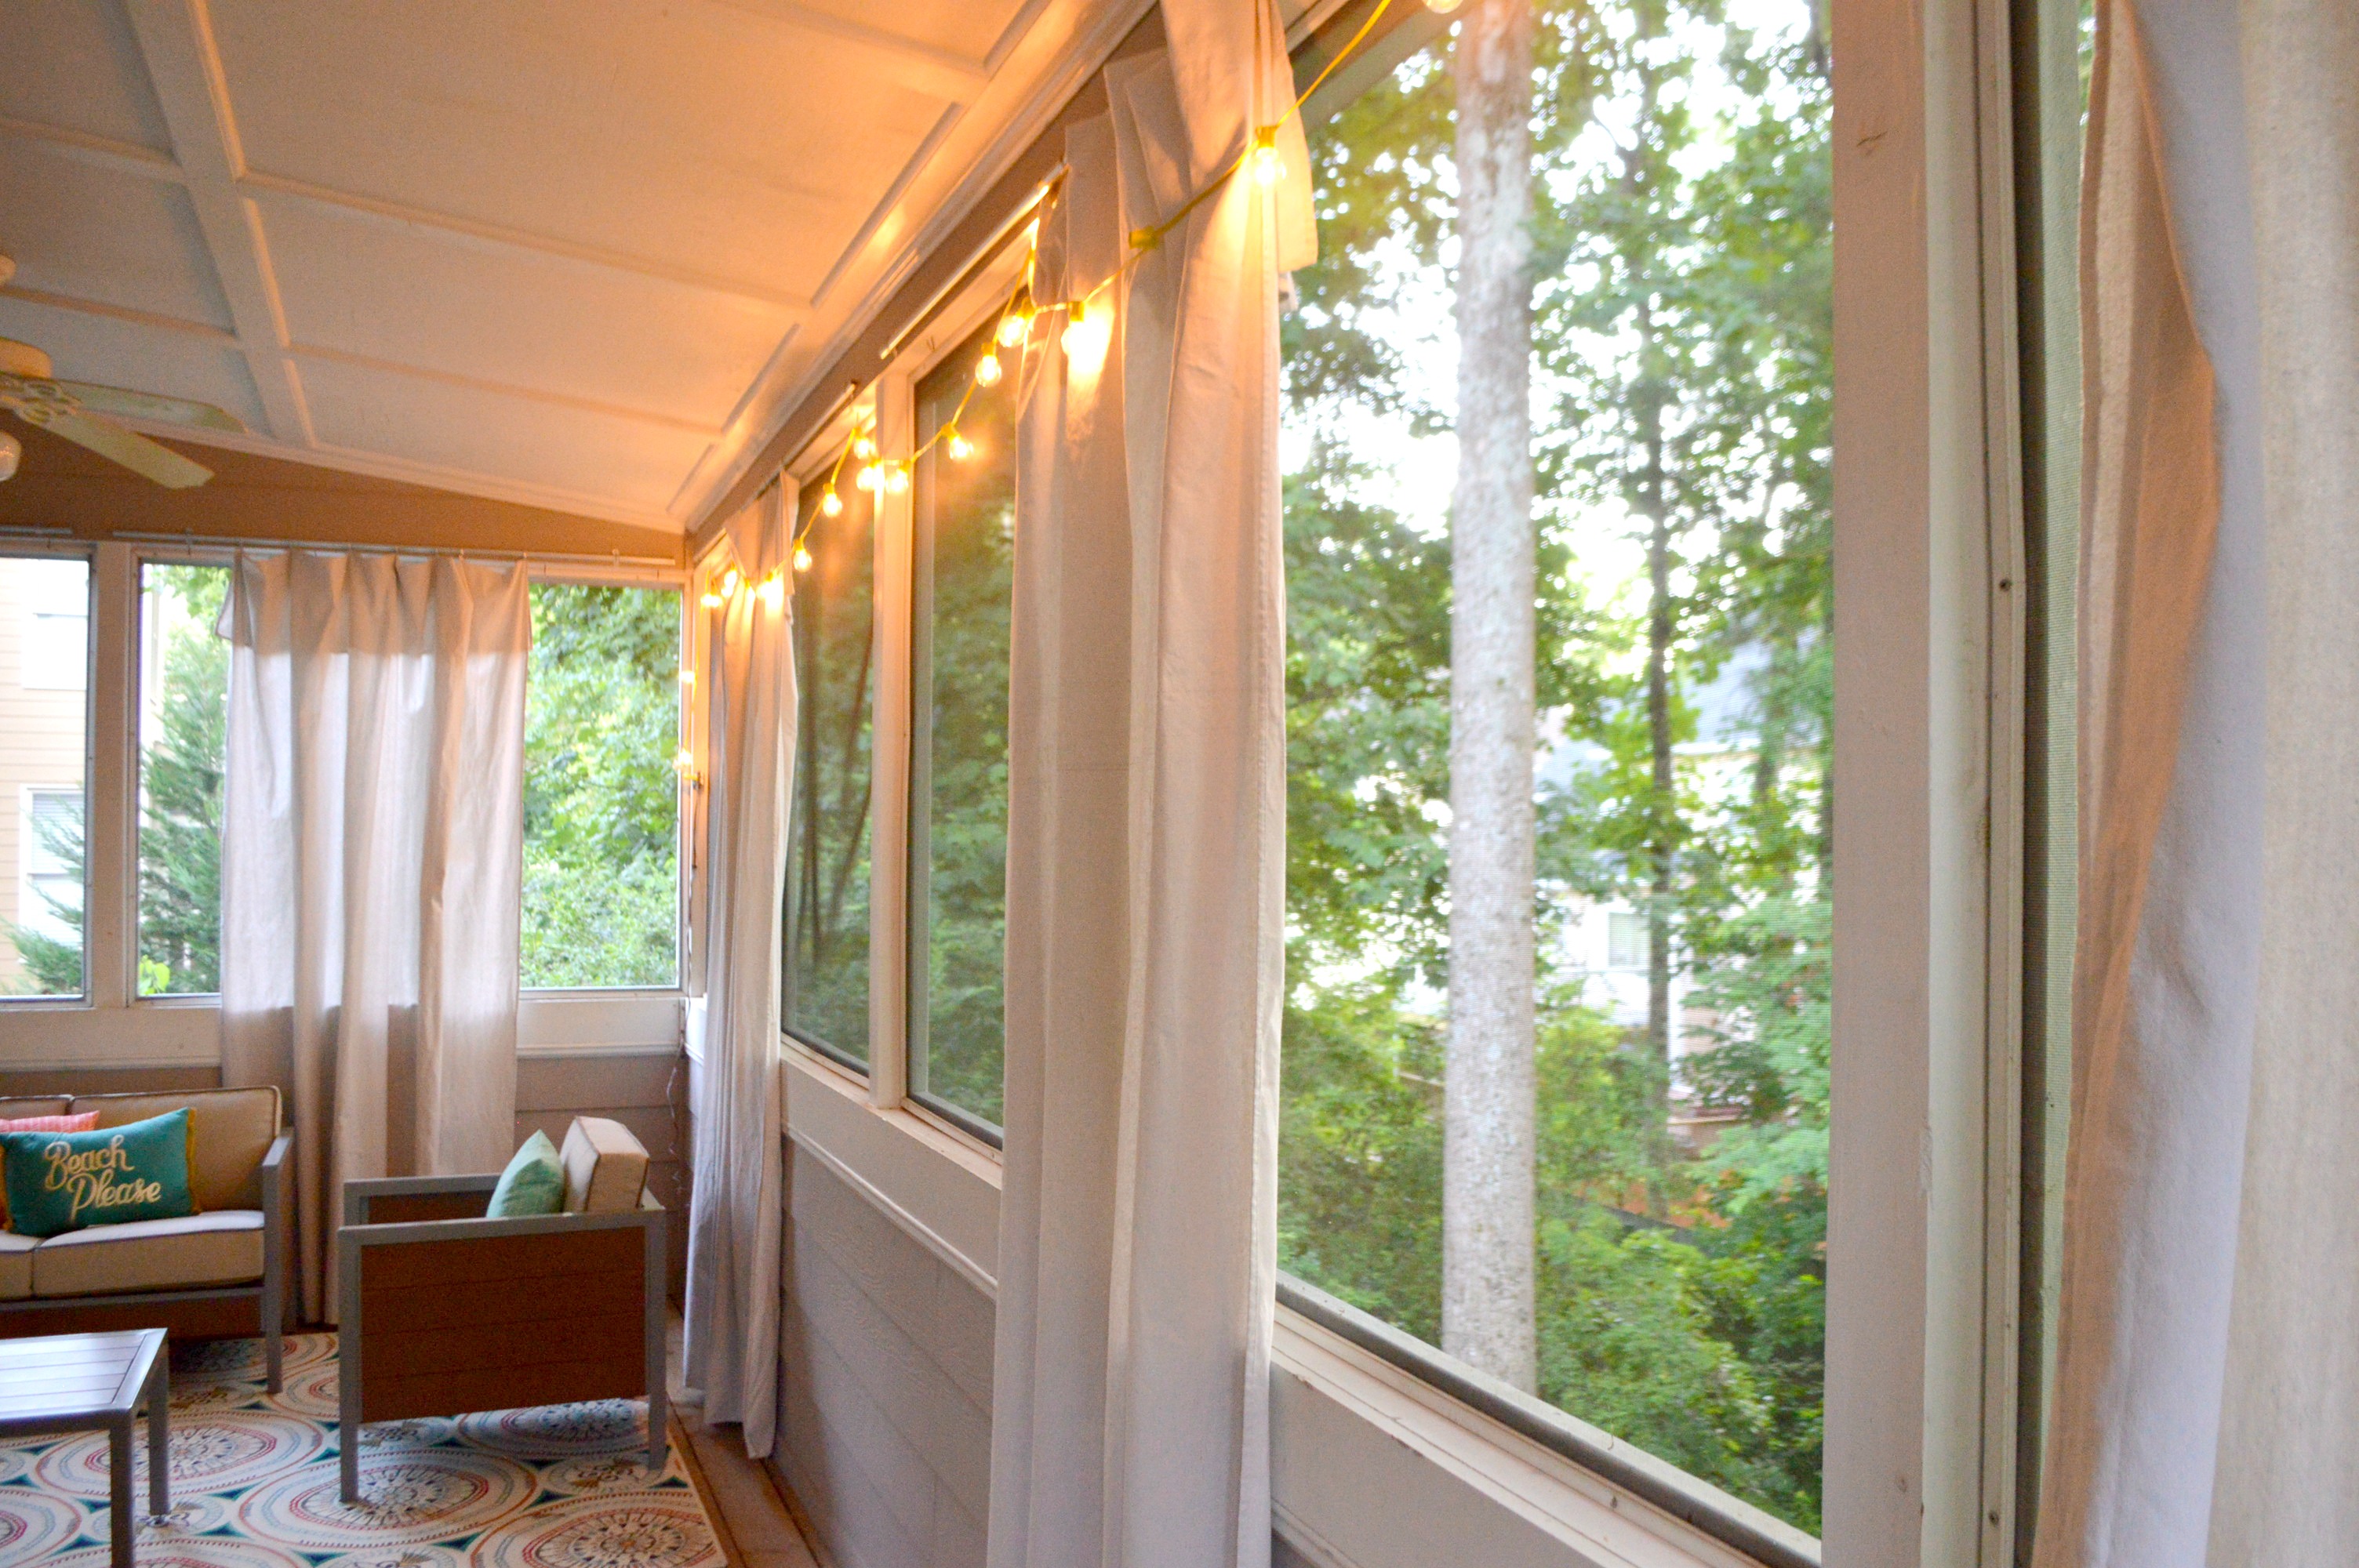
I love my little oasis! I think the curtains gave my porch a cabana/resort like feel. I saved a ton of money doing it this way. I covered 8 large windows for under $85! I plan to add two more drop cloth curtains on the windows to the right. It may have been a cheap project but it was a lot of work. I almost fell through the screens a few times. I’m sure my neighbors got a few laughs. Some people prefer blinds to curtains as they let in less light and therefore have more privacy, if this is somthing that interests you, you can easily find your local Shuttercraft expert so you can have your blinds fitted professionally. Alteratively, you can buy the blinds for your house and attempt to fit them yourself. If you’re looking to curtain an outdoor area, you may actually want to consider these pop up gazebos here and see if they meet your budget and intended use.
Here are a few pins from Pinterest that helped me out with the curtains HERE and HERE. What do you think of Mommy Oasis so far? You can find details on my furniture HERE. Feel free to pin like crazy.
Shilene
July 1, 2016 at 8:57 amI love it! It sounds like it was quite the job but worth it as you saved money. I’m inspired to crest a mommy oasis ??
ourdelightfulhome@gmail.com
July 4, 2016 at 6:16 pmI can’t wait until I get a porch like this 🙂
Emme
July 11, 2016 at 6:12 pmYou are AMAZING, Woman!